How Much Gravel Do I Need for a Driveway?
How Much Gravel for a Driveway: Complete Calculation Guide 2025
Introduction
Determining how much gravel for a driveway you’ll need is one of the most important first steps in creating a durable, functional entrance to your property. Whether you’re building a brand-new driveway or refreshing an existing one, getting the calculation right can save you significant time, money, and frustration. This comprehensive guide will walk you through everything you need to know about calculating gravel quantities, selecting the right materials, and installing a beautiful driveway that will serve you well for years to come. We’ll cover professional-grade techniques, practical tips, and common mistakes to avoid, ensuring you have all the information needed to make informed decisions about your driveway project.
Table of Contents

- Introduction
- Why Calculating Gravel for Your Driveway Matters
- Step-by-Step Guide to Calculate How Much Gravel for a Driveway
- Best Gravel Options for How Much Gravel for a Driveway
- Pro Tips for How Much Gravel for a Driveway
- Common Mistakes to Avoid
- Key Takeaways
- Frequently Asked Questions About How Much Gravel for a Driveway
- Conclusion
Why Calculating Gravel for Your Driveway Matters
Accurately calculating how much gravel for a driveway is essential for several compelling reasons. First, proper estimation prevents costly overages and wasteful spending on materials you won’t use. Additionally, calculating the correct amount ensures you have adequate coverage to create a stable, level driving surface that will handle vehicle weight effectively without developing ruts or soft spots.
When you know exactly how much gravel for a driveway you need, you can budget more effectively and plan your project timeline with precision. Underestimating materials means multiple trips to the supplier, increased labor costs, and project delays that can disrupt your schedule. A properly calculated gravel driveway also provides better drainage, reduces dust problems, and creates a more professional appearance that enhances your property’s curb appeal.
The foundation of any quality driveway starts with understanding layering requirements and depth specifications. Different gravel types serve different purposes—crushed stone provides a stable base, while decorative gravel adds aesthetic appeal. Having the right quantities of each layer ensures your driveway performs optimally, lasts longer, and requires less maintenance over time. Investment in proper calculation upfront saves tremendous money in repairs and replacements later.
Step-by-Step Guide to Calculate How Much Gravel for a Driveway
Measure Your Driveway Area
Begin by measuring the length and width of your entire driveway area in feet. For standard residential driveways, most homeowners measure approximately 10-12 feet wide and 20-30 feet long, though dimensions vary significantly based on property size and vehicle requirements. Use a measuring tape or laser measure for accuracy, and sketch a simple diagram noting these measurements.
If your driveway has an irregular shape, divide it into rectangular sections, measure each separately, and add the areas together. For curved driveways, estimate the area by measuring approximate rectangles or use the shape to calculate an average width multiplied by the total length. Document all measurements carefully, as accuracy directly impacts material ordering and project success.
Determine Optimal Depth Requirements
Professional driveway construction typically requires three layers of gravel material, each serving a specific purpose in the overall structure. The base layer consists of large crushed stone (2-3 inches deep) that provides drainage and foundation stability. The middle layer uses smaller crushed stone or gravel (2-3 inches deep) that compacts well and creates a stable sub-base for the surface layer.
The top layer features decorative or finishing gravel (1-2 inches deep) that provides traction and aesthetic appeal. Total depth for a standard residential driveway should range from 5-8 inches, depending on local soil conditions and climate factors. Areas with heavy rainfall or poor drainage may require deeper base layers, while stable, well-draining soils can sometimes work with slightly shallower depths.
Calculate Volume Using the Formula
The fundamental formula for calculating volume is straightforward: Length (feet) × Width (feet) × Depth (feet) ÷ 27 = Cubic Yards. For example, a driveway measuring 10 feet wide, 25 feet long, and 0.5 feet deep (6 inches) would calculate as: 10 × 25 × 0.5 ÷ 27 = 4.63 cubic yards. Always round up to the nearest half-yard to account for settling and compaction.
Remember that gravel settles and compacts when walked on or driven over, so ordering slightly more than your calculated amount ensures complete coverage after settling occurs. Most professionals recommend adding 10-15% extra material to your calculations to compensate for compaction. It’s better to have leftover gravel for future repairs than to run short midway through installation.
Identify Your Layer Requirements
For the base layer (largest crushed stone), calculate how much gravel for a driveway you’ll need using the full recommended depth of 2-3 inches. For example, that same 250-square-foot driveway would require approximately 2.5 cubic yards of base stone at 3 inches deep. The middle layer calculation uses the same area dimensions, also requiring approximately 2.5 cubic yards of smaller crushed stone.
The top layer calculation might use only 1.5 cubic yards of decorative gravel at 2 inches deep, creating visual appeal while maintaining functionality. Total requirements for this example driveway would be approximately 8-9 cubic yards of gravel materials across all three layers. Breaking down requirements by layer ensures each section receives appropriate material for its specific function.
Account for Compaction and Settlement
Gravel naturally compacts when weight is applied, reducing volume by 10-20% depending on material type and compaction method. This settling is normal and necessary for creating a stable driveway surface, but it means you’ll need more material than your initial volume calculations suggest. If your calculations show you need 9 cubic yards total, ordering 10-11 cubic yards accounts for this natural settling process.
Climate conditions affect compaction rates as well. Areas experiencing freeze-thaw cycles may see additional settling during winter months, while arid climates see relatively stable compaction. Plan your material ordering with these regional factors in mind, especially if you’re installing during certain seasons. Proper calculation with compaction factors ensures your driveway maintains consistent depth and performance throughout its lifespan.

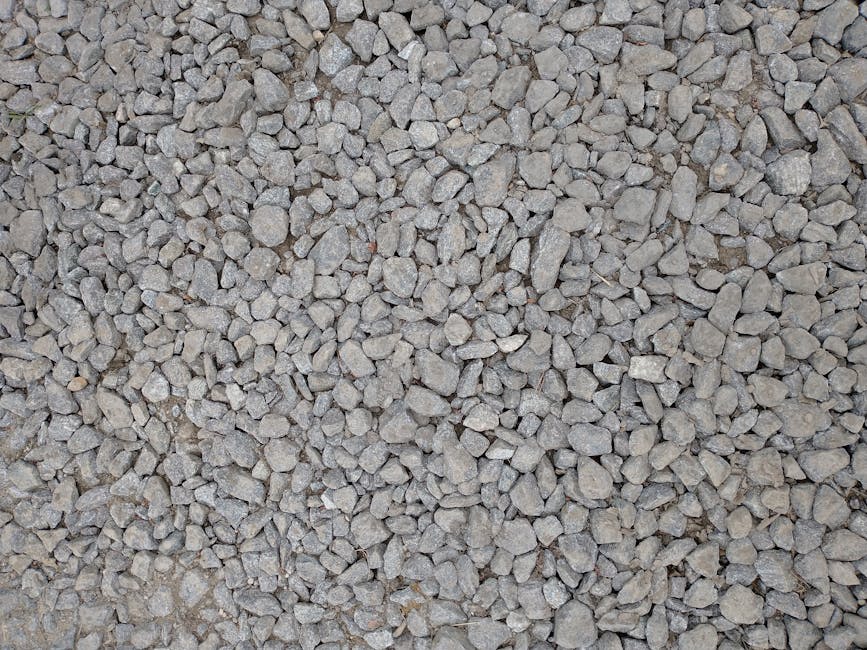
Best Gravel Options for How Much Gravel for a Driveway
Crushed Granite or Stone for Base Layers
Crushed granite provides excellent drainage and compaction characteristics, making it ideal for base layer installation. This durable material withstands heavy vehicle traffic without degrading quickly, and its angular shape locks together effectively when compacted. For the base layer, select 2-3 inch crushed granite pieces that create a stable foundation resistant to settling and rutting.
The primary advantage of crushed granite is its longevity—it can last 5-10 years or longer before requiring replacement, far exceeding performance of softer materials. Crushed granite typically costs $1.50-$3.00 per cubic yard, making it an economical choice for foundation layers. Its neutral grey appearance also works well aesthetically if left exposed as the top layer.
Crushed Limestone for Middle Layers
Crushed limestone offers excellent compaction properties and creates a stable sub-base that locks together effectively. The material compacts well under its own weight and vehicle traffic, reducing the overall depth needed compared to some alternative materials. Limestone typically costs $2.00-$4.00 per cubic yard and provides reliable performance for middle-layer applications.
Limestone’s buff or tan color provides an attractive appearance if visible, and it bonds well with upper gravel layers to create a cohesive driveway structure. The material’s angular particles interlock securely when compacted, resisting displacement and maintaining consistent surface level. For most residential driveway projects, limestone represents an excellent balance of performance, cost, and durability for middle-layer specifications.
Decorative Gravel for Finishing Layers
Decorative gravel varieties like marble chips, crushed shells, or colored stone create attractive finishing layers while providing practical traction for vehicles. These materials range from $3.00-$8.00 per cubic yard depending on the specific type and regional availability. Marble chips offer elegant appearance and good traction, while crushed shells provide coastal-style aesthetics in appropriate regions.
Jersey Shore gravel, crushed coral, or pea gravel creates smooth, attractive surfaces with pleasant walking characteristics. When selecting decorative gravel, prioritize materials that compact reasonably well and provide adequate traction during wet conditions. Consider your home’s architectural style and landscape design when choosing decorative options to ensure harmonious integration with your property’s overall appearance.
River Rock and Pea Gravel Considerations
River rock and pea gravel offer aesthetic appeal but present challenges for driveway applications due to poor compaction and displacement issues. These smooth, rounded materials roll and shift under vehicle weight, making them less ideal for primary driveway surfaces. However, they work acceptably for decorative top layers only if applied over properly compacted crushed stone or limestone bases.
If using river rock or pea gravel, limit application to the top 1-2 inches of your driveway and ensure substantial base layers beneath. These materials typically cost $2.50-$5.00 per cubic yard and provide beautiful visual appeal despite their functional limitations. Regular raking and maintenance becomes necessary to redistribute displaced stones and maintain consistent surface coverage.
Recycled Asphalt for Budget-Conscious Projects
Recycled asphalt provides an economical option at $1.00-$2.50 per cubic yard and actually hardens over time when exposed to heat and sunlight. This material works well for base and middle layers, compacting effectively and improving performance as it ages. Recycled asphalt provides good traction and creates a dark surface that looks attractive while hiding dirt and dust.
The main disadvantage involves potential tracking of asphalt particles during installation and in extremely hot weather when material may become slightly sticky. Despite these minor concerns, recycled asphalt offers excellent value for budget-conscious homeowners seeking reliable driveway performance. Many contractors favor this material for its environmental benefits and long-term cost savings.

Pro Tips for How Much Gravel for a Driveway
Invest in Proper Equipment and Tools
Renting a plate compactor ($40-$75 per day) significantly improves driveway quality by ensuring each layer compacts thoroughly and creates a stable base. A wheelbarrow and shovel allow you to distribute materials evenly across your driveway area. A level helps ensure proper drainage slope (typically 1-2% grade away from structures), preventing water pooling and extending driveway lifespan.
Quality tools make the installation process more efficient and produce superior results compared to manual spreading and compacting. If your driveway exceeds 500 square feet, consider renting professional equipment rather than attempting manual compaction. Proper equipment investment pays dividends through improved durability and reduced maintenance requirements.
Create Proper Drainage Solutions
Establish adequate drainage by sloping your driveway slightly away from buildings and structures, directing water toward landscaping or storm drains. Avoid creating dips or low spots where water collects, as standing water accelerates material deterioration and creates muddy, unstable surfaces. If your property has poor natural drainage, consider installing French drains or drainage pipes beneath the gravel base.
Proper drainage directly impacts driveway longevity, potentially extending lifespan by several years compared to poorly drained installations. Even a slight 1-2% slope prevents water accumulation while remaining imperceptible to vehicle operators. Before ordering materials, assess your property’s natural drainage patterns and plan accordingly to maximize driveway performance and durability.
Plan for Seasonal Maintenance
Schedule raking and top-layer replacement during spring and fall to maintain appearance and functionality throughout the year. Winter conditions can displace gravel, especially in regions experiencing freeze-thaw cycles, so plan repairs for warming months. Regular maintenance involves refreshing the top layer with new decorative gravel every 2-3 years, an inexpensive process that dramatically improves appearance.
Budget approximately $200-$400 annually for maintenance and refreshing on a standard residential driveway. This modest investment prevents larger repairs from becoming necessary and extends overall driveway lifespan significantly. Preventive maintenance is far more economical than addressing damage after it develops.
Calculate Extra Materials for Future Repairs
Order 1-2 extra cubic yards of matching gravel and stone for future touch-ups and repairs. This reserve supply proves invaluable when addressing rutted areas or places where settling created depressions. Keeping consistent materials on hand prevents costly emergency supplier visits and ensures color and texture matching for professional-looking repairs.
Store reserved materials in a sheltered location, protecting them from weather contamination while keeping them accessible for future use. This simple practice transforms potential frustrations into manageable maintenance tasks with minimal cost impact.

Common Mistakes to Avoid
Underestimating Material Requirements
The most frequent mistake involves miscalculating dimensions or failing to account for settling and compaction. Many homeowners measure only usable driving width, forgetting to include edge borders needed for structural stability and visual appeal. Ordering insufficient materials forces expensive mid-project material purchases and creates quality inconsistencies between delivery batches.
Always add 15-20% to calculated volumes to ensure adequate coverage after settling occurs. Better to have leftover materials than to discover shortages after you’ve partially completed installation. Document your calculations and keep records for future reference and comparison with actual material usage.
Skipping the Base Layer or Using Inadequate Depth
Creating a durable driveway requires substantial base layers of large crushed stone, not just spreading a thin layer of attractive finish material across soil. Without proper base preparation, your driveway will develop ruts, soft spots, and washboard surfaces within months. Base layers provide the foundation that allows your driveway to handle vehicle weight without degradation.
Invest in proper base layers even if budget constraints require compromising on decorative finish materials. A functional driveway with modest appearance beats an attractive but poorly functioning surface every time. Proper construction with adequate depth prevents expensive repairs and replacements within a few years.
Failing to Address Drainage Issues
Neglecting drainage planning results in water accumulation, rapid material deterioration, and muddy, unstable driving surfaces. Poor drainage is the primary cause of premature driveway failure and expensive repairs. Assess your property’s drainage before ordering materials and incorporate solutions such as edge drainage or slight slopes during installation.
Water management directly impacts driveway longevity, so make this a priority planning step. Spending a few dollars extra on proper drainage saves hundreds in future repairs and maintenance.
Not Compacting Layers Properly
Skipping or minimizing layer compaction dramatically reduces driveway lifespan and creates surfaces prone to rutting and displacement. Each layer must be compacted thoroughly before applying the next layer. Proper compaction creates an interlocked structure that efficiently distributes vehicle weight and resists settling.
Rent compacting equipment and invest time in thorough layer-by-layer compaction. This effort directly translates to a driveway that serves you reliably for many years.
Selecting Inappropriate Gravel Types
Using decorative gravel for base layers or smooth river rock for the entire driveway surface creates problems that emerge quickly after installation completion. Match material types to their intended layers—crushed stone for base layers, limestone for middle layers, and decorative gravel for finishing. Proper material selection ensures optimal performance for each layer’s specific function.
Key Takeaways
-
Accurate Measurement is Essential: Calculate length × width × depth ÷ 27 to determine cubic yards needed, accounting for 10-15% extra material for settling and compaction.
-
Three-Layer System Works Best: Combine large crushed stone base (2-3″), crushed limestone middle (2-3″), and decorative top layer (1-2″) for optimal performance and appearance.
-
Proper Drainage Prevents Failure: Slope your driveway 1-2% away from structures and plan for water management to extend lifespan significantly.
-
Layer Compaction Ensures Durability: Rent equipment and thoroughly compact each layer before adding the next to create stable, long-lasting surfaces.
-
Regular Maintenance Keeps Driveways Beautiful: Plan annual raking and every 2-3 year top-layer refreshing to maintain appearance and function throughout the driveway’s lifespan.
Frequently Asked Questions About How Much Gravel for a Driveway
Q: What is the most popular depth for how much gravel for a driveway?
A: Professional driveway construction typically uses 6-8 inches total depth across three layers: 2-3 inches of base stone, 2-3 inches of crushed limestone, and 1-2 inches of decorative gravel. This depth provides excellent drainage, stability, and durability for residential vehicles. Properties with poor drainage or heavy clay soils may benefit from 8-10 inches total depth for maximum foundation stability.
Q: How do I use how much gravel for a driveway calculation tools effectively?
A: Start with precise measurements of your driveway length and width in feet, then determine your desired depth based on regional recommendations and soil conditions. Input these measurements into online calculators or use the manual formula: (length × width × depth) ÷ 27 = cubic yards. Always round up and add 10-15% extra material to account for settling and ensure complete coverage after compaction.
Q: How often should I refresh my gravel driveway?
A: Plan to refresh the top decorative layer every 2-3 years depending on traffic volume and climate conditions. Base and middle layers typically last 5-10 years or longer before requiring replacement. Regular maintenance involving raking and redistributing displaced stones extends the time between major refreshing projects.
Q: Can I use different gravel types together?
A: Yes, and it’s recommended! Use large crushed stone for the base, medium crushed limestone for the middle, and decorative gravel for the top. This layered approach maximizes durability, drainage, and appearance. Avoid mixing gravel types within the same layer, as this reduces compaction effectiveness and structural integrity.
Q: What factors affect how much gravel for a driveway I need?
A: Driveway dimensions directly impact material requirements, with longer and wider driveways obviously requiring more material. Desired depth based on climate and soil conditions affects volumes significantly, as does accounting for settling and compaction. Vehicle weight and traffic frequency also influence recommended depth—commercial or heavy-use driveways require deeper foundations than residential applications.
Conclusion
Understanding how much gravel for a driveway you need is the critical first step toward creating a beautiful, functional entrance to your property that will serve you reliably for years. By measuring accurately, calculating properly, and accounting for settling and compaction factors, you’ll order the right material quantities and avoid costly mistakes. Implementing the three-layer system with appropriate materials for each layer, ensuring proper drainage, and committing to regular maintenance will extend your driveway’s lifespan significantly while maintaining attractive appearance. Whether you’re a seasoned DIY enthusiast or tackling your first major home improvement project, this comprehensive guide provides all the information needed to achieve professional-quality results. Start your project with confidence today and enjoy a driveway that enhances your property’s value and curb appeal for years to come!
Recommended Products on Amazon
As an Amazon Associate I earn from qualifying purchases.